I say this a lot when I talk to kids: There’s no such thing as learning “how to draw”; there’s only how you draw. Me, I draw little weird, but here’s how I do it.
First, obviously, you need an script. The idea for this comic was for one of the Kickstarter backers, Kirk Damman. He requested something about the Cubs/Cards rivalry. Bad news for him, though: I don’t know squat about baseball. So I took it in my own direction after a little brainstorming.
When I write for myself, whether I’m drawing something by hand or in Illustrator, what I end up doing is start with a blank template and start typing dialogue. I try to keep the bare amount of dialogue to hit the beats needed to get from Point A to Point B — in this case, from the premise (movie geek sort of ranting about not getting baseball) to the inversion of it (the idea that he’s basically a hypocrite). It’s a common set-up, particularly with Jason.
With vector-drawn comics, one luxury I have is the ability to revise dialogue until the last minute, because I’m constantly able to recompose a panel around a larger or smaller word balloons, shift panels around, or whatever.
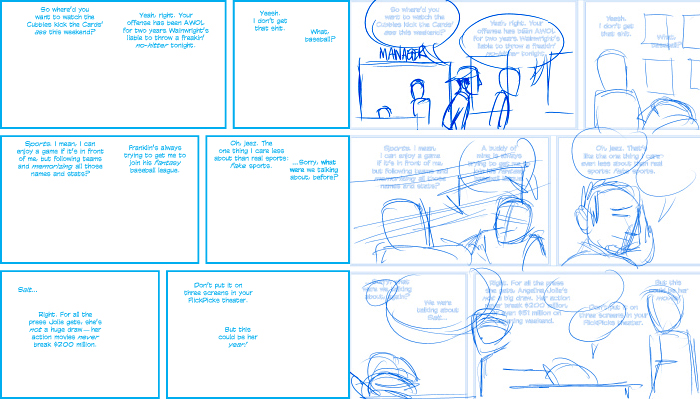
With hand-drawn stuff, I need to plan things out a lot better, because once I ink a page, I can’t revise things nearly as easily. After the dialogue is pretty much nailed down, I cut and paste the panel borders and letters into Manga Studio Debut and scribble out little more than stick figures and a few scratches to get the general idea down.

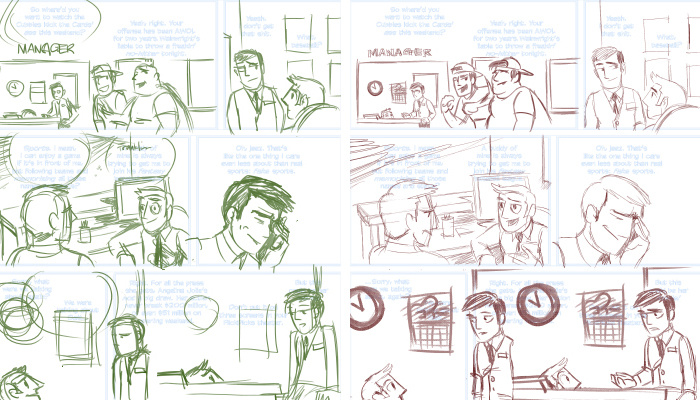
I try to do at least three passes of thumbnails, with each pass getting tighter and fine-tuning the composition of each panel. The more thumbnails I do, the better my finished pencils turn out. A better inker than I — or someone with a looser style, at least — could probably get away with just a couple of scribbles and jumping straight into inks, but not me.
I do each pass on a separate layer in Manga Studio, keeping the previous pass visible at about 15% opacity. I typically change colors on each layer, so that I can easily distinguish which lines are from which pass. This is roughly analogous to the way I use Colerase pencils for penciling.

This is where my process gets a little weird. I like the ability to digitally tweak my thumbs in Manga Studio, but for finished pencils, I prefer the way a real pencil feels and reacts to real paper — so what I’ll print out the final pass of thumbnails onto Bristol paper using my large format inkjet and do my finished pencils traditionally. Printing that out at about 10–15% cyan is basically the equivalent of a non-photo blue; it won’t get picked up by the scanner (or if it does, it will barely be noticeable). Before I got the large format printer, I would use a lightbox to “transfer” my thumbs to the Bristol page. It was slower, but it worked well, too.
I do my finished pencils on top of the printed-out last round of thumbs with a Colerase Dark Blue pencil. The finished pencils for this comic were done at about 11″x14″; you can see them below (after the cut). Before I ink a page, I scan my pencils in and print them out again, so that if I screw up the inks dramatically, I can just print out another page — but I’ll get to that in Part Two.
